I did make my husband and I stockings. This project has been in the works for a long time- I got the faux fur from my mom's stash specifically to make these in June! Nearly a yard of red linen blend was found in remnants in September after the local college's sororities had used most of the bolt in the name of school spirit.
 |
| Yes, this is instagramed. I have horrible lighting in my house. |
It just took me til last week to do anything with the materials.
First up, I had to have a pattern for the stocking shape. If you own a stocking, you can just trace it and add about 1/4-1/2" all around for your seam allowance. Since this is our first Christmas, we have very few decorations and the stockings we grew up with have stayed with our parents: hence the need for me to make some. A quick google image search turned several shapes you can download, trace, enlarge, whatever. The stocking won't fit anyone anyway, so as long as you're happy with it, it's fine. If it doesn't include the size of fur strip you'll need, then you'll need to make your own pattern piece. First, how thick of a cuff do you want? Copy/trace that amount of inches from the top of the stocking onto another piece of paper, marking which end is the toe and heel end. Fold the fur in half and place the toe end of your pattern piece against the fold, then cut (you'll get one long strip instead of two pieces. You could also do it with two pieces, but I did it with one).
The red stocking part is incredibly simple. I serged my pieces because the fabric would fray like crazy otherwise. The cuff was the hard part.
Faux fur is incredibly weird to work with. It sheds more than my dog and that's saying something. Most tips I found suggested small cuts using scissors or craft knifes on the wrong side of the fur and not to cut through the fur itself. But how does one finish off a cut end? I couldn't find a tutorial, so I modified a technique I found to make a vintage faux fur collar. She has great pictures that explain each step.
I cut one faux fur strip and one same sized lining (I suggest white cotton, but I'm not entirely sure a liner is even needed for a stocking. However, the faux fur collar used one, so I did too). Tack the lining to the faux fur using an uneven, shallow basting stitch that just catches the fur backing (I basted on one and didn't on the other. I highly suggest basting). Sew twill/hem tape to the edge of the right side of the fur using a zig zag stitch. I had silver hem tape in my stash and didn't feel like purchasing white. Festive! And cheap! Cut off any excess cuz this is going to get thick.
 |
| machine zig zag stitch to the edges of the fur. |
Fold the binding tape over on one side so that the faux fur edge is contained and use a running stitch to tack it to the lining. The other end will be attached to the stocking proper.
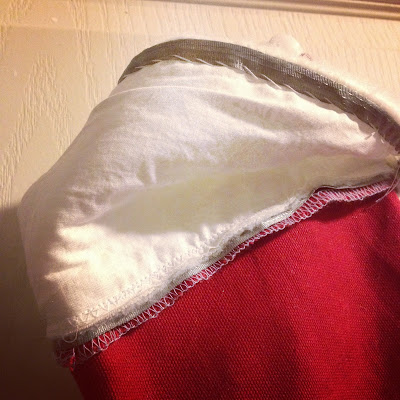
Pin the right side of the fur to the WRONG side of the stocking (i.e. turn the stocking inside out) with the tape folded towards the top of the stocking. The zig zag stitch on the right side of the fur should be hidden by the tape folding over itself. This is hard to see in the pictures, but the second one below this paragraph shows it slightly better than the first one. After I pinned it together, I stitched the fur together for that back seam in the first photo (taking care not to get any red stocking in the seam). I feel like there was probably a better point/time to do that step, but I'm not really sure what it is since I knew that my paper pattern wasn't very exact. I straight stitched the fur to the stocking using the bottom of the zig zag as a guide.
 |
| RIGHT side of fur pinned to inside-out stocking with fur seamed |
 |
| Hard to see, but I stitched a straight stitch using the bottom of the zig zag as my guide |
Then I turned the stocking right side out and folded the faux fur cuff over. You can make a simple tube out of the red material about 1.5" wide and 6" long and stitch it to the stocking so you can hang it. My tube is still inside out because I found the fabric too thick to turn right side out without a super cool tool made for turning tubes right side out.
 |
| Yay, all done! |
There. All done. Now we have our very own stockings.
